


설계/시공가이드
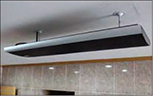
Offering antibacterial and deodorizing effects, SUNRADI is a
far-infrared radiant heating system for high ceilings that suits health-conscious lifestyles.
 Estimation of the Capacity

Simplified Method to Estimate the Required Capacity (Korea oriented Method)
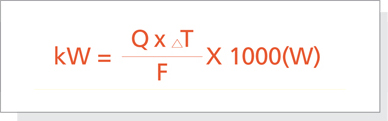
Q: Volume of the Target Space(m³)
T₁ : Initial Temperature Before Heating(℃)
T₂ : T₂: Target Temperature(℃)
△T : Temperature Difference between the Initial Temperature and the Target Temperature(T₂-T₁)
F : Insulation Factor
| Insulation Status | Insulation Factor[F] | Initial Temperature Before Heating | |||
| Excellent insulation (Sauna) | 350 | 22℃ | |||
| Very good insulation (Multi-family residential buildings) | 300 | 19℃ | |||
| Good insulation (Single-family houses) | 250 | 16℃ | |||
| Moderate insulation (South-facing offices) | 200 | 13℃ | |||
| Fair insulation (North-facing offices) | 150 | 10℃ | |||
| Poor insulation | 100 | 7℃ | |||
| Almost No Insulation | 75 | 4℃ | |||
 Outdoor air temperature is assumed to be 10℃.
Once the required capacity is estimated, the models of the panels and their numbers can be determined based on that.
Samples for the Estimation of the Capacity
| Spaces |
|
Height (m) |
Volume (m³) |
Initial Temp[T₁] (℃) |
Target Temp[T₂] (℃) |
Temp. Difference [T₂-T₁] (℃) |
Insulation Factor [F] |
Capacity (W) |
Applicable Panels | |||||
| Public bathrooms (Freeze protection) |
|
2.4 | 36 | 5 | 13 | 8 | 250 | 1,152 | S U N J O Y |
[SR-5D]*2 | ||||
| Residential bathrooms |
|
2.4 | 12 | 15 | 25 | 10 | 300 | 396 | [SR-4D]*1 | |||||
| Small-size offices |
|
2.4 | 32 | 15 | 25 | 10 | 200 | 1,584 | [SR-8D]*2 | |||||
| Patient rooms in hospitals |
|
2.4 | 64 | 12 | 25 | 13 | 250 | 3,307 | [SR-8D]*4 | |||||
| Studio apartments |
|
2.4 | 95 | 15 | 25 | 10 | 250 | 3,792 | [SR-9D]*4 | |||||
| Factory control rooms |
|
3.0 | 297 | 10 | 20 | 10 | 200 | 14,850 | S U N R A D I |
[SH-S25]*6 | ||||
| Large-size offices |
|
2.4 | 792 | 13 | 25 | 12 | 250 | 38,016 | [SH-S25]*16 | |||||
| Hair salons, Skin care shops |
|
3.0 | 248 | 15 | 25 | 10 | 250 | 9,900 | [SH-S25]*4 | |||||
| High-ceiling stores |
|
3.0 | 99 | 13 | 22 | 9 | 200 | 4,455 | [SH-S16]*3 | |||||
Location shall be determined considering the interference from finished surface of ceiling such as ventilation facility, lights or partitions.
Heater shall be installed with 600mm distance from outer wall, and between heating plates the distance shall be twice than this distance. Various size are available so that it can be installed any space.
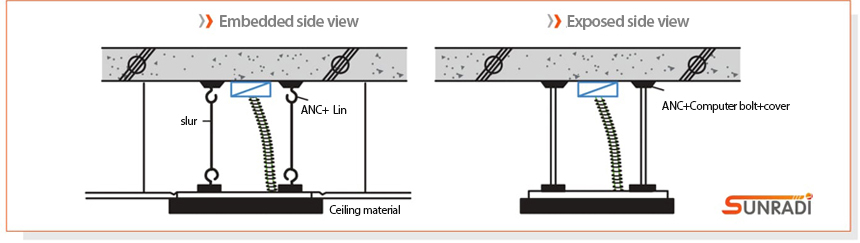
System Design
Installation Diagrams
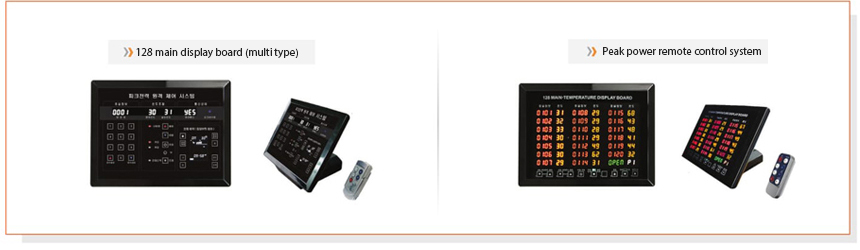
Thermostats and Remotes
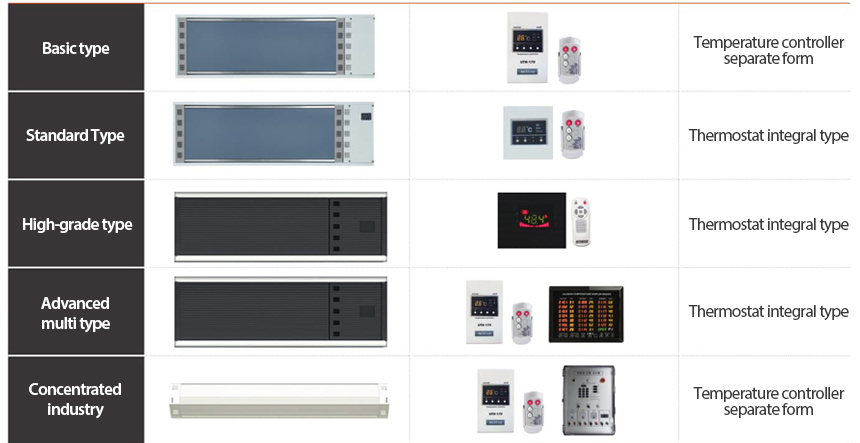
Cetral controll type Thermostat system.
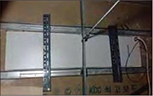
Installation
Embedded type
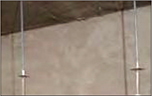
① Select a location to install considering the space between strong anchors

② Mark the location to install strong anchor
③ Install strong anchor on the marked location on the ceiling
④ Connect upper bracket and upper eyebolt to strong anchor
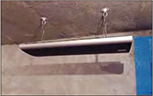
⑤ Connect lower bracket and lower eyebolt on the back side of product, and then connect to the upper eyebolt installed on the ceiling with wire while taking care of horizontal alignment.
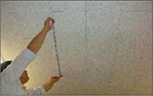
① Select a location to install considering the product's size.
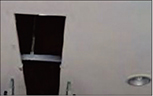
② Remove ceiling material of the area to install. (In case of new buildings, leave the area to install open.)
③ Install anchor at 1/4 position both side of product at right angle to ceiling frame (M-BAR or T-Bar), and then connect the product with bolts. (If the ceiling frame is not strong enough to support the product, install additional supporters.)
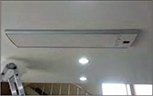
④ Installation completed
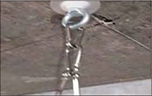
Exposed type
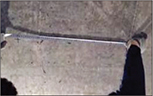
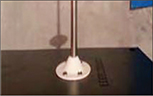
① Select a location to install considering the space between strong anchors

② Mark the location to install strong anchor
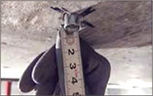
③ Install strong anchor on the marked location on the ceiling
④ Connect stud bolt to strong anchor and adjust the length
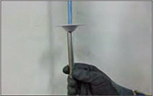
⑤ Connect upper bracket and covering pipe of stud bolt to stud bolt
⑥ Connect lower bracket and lower eyebolt on the back side of the product
⑦ Installation completed
Cautions during installation
① Be careful to prevent any life damage caused by electric leakage in moist area such as bathroom.
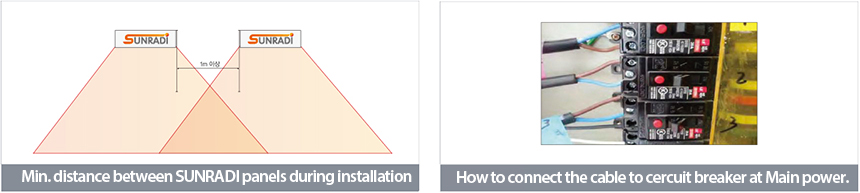
② When multiple products are installed together, the distance between products shall be 1m at least.
③ When product is installed near transparent glass window closely, heat loss is high by the loss of radiant heat to outside through such transparent glass, therefore it is recommended to install minimum 1m from the window.
④ Install the cable of SUNRADI to the circuit breaker of switch board.
⑤ Crimp type terminal log shall be used for all terminals of cable used for SUNRADI and installation.


